Firebase Configuration
📘 Context Integrate Firebase with your Bubbl platform to enable push notifications, analytics, and geofencing.
Follow these steps to wire up Firebase for your Bubbl backend, Android & iOS clients, and ensure all required capabilities are enabled.
Step 1: Navigate to the Firebase Console
- Visit console.firebase.google.com.
- Sign in with your Google account.
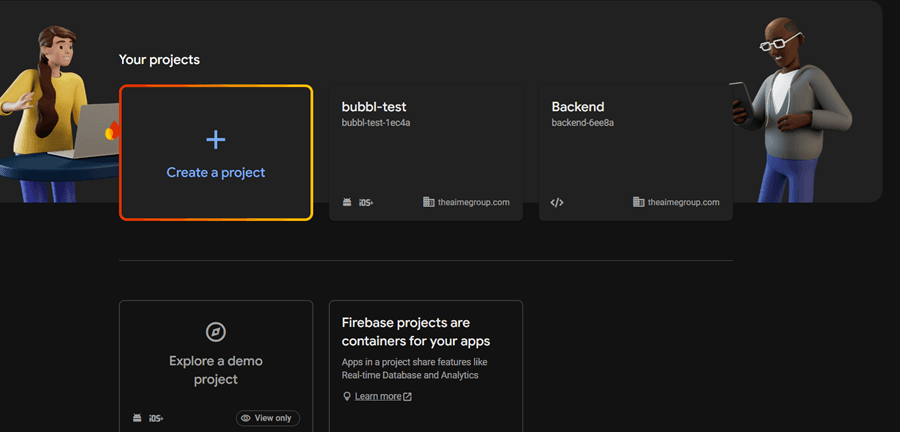
Step 2: Select Your Project & Service Accounts
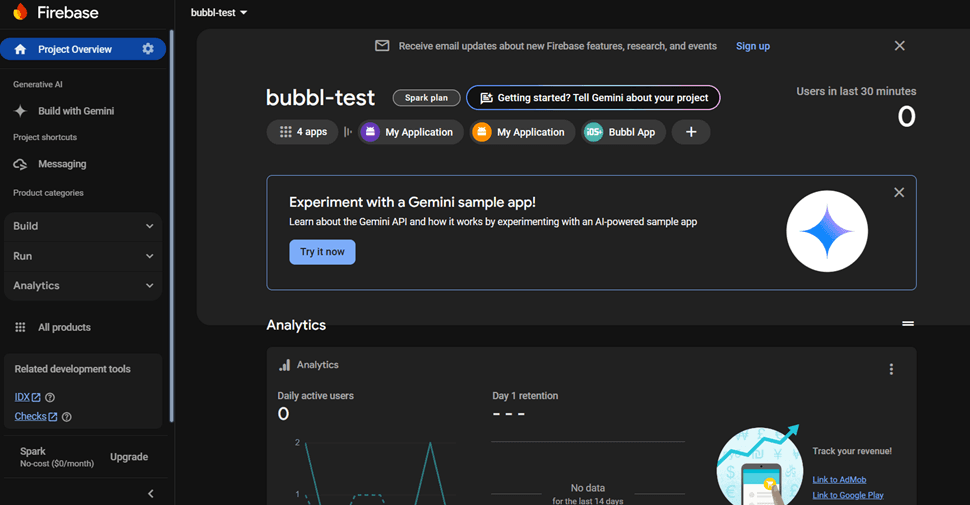
- Choose your project from the selector.
- Click the ⚙️ Settings gear → Project settings.
- Switch to the Service accounts tab.
Step 3: Generate a New Private Key
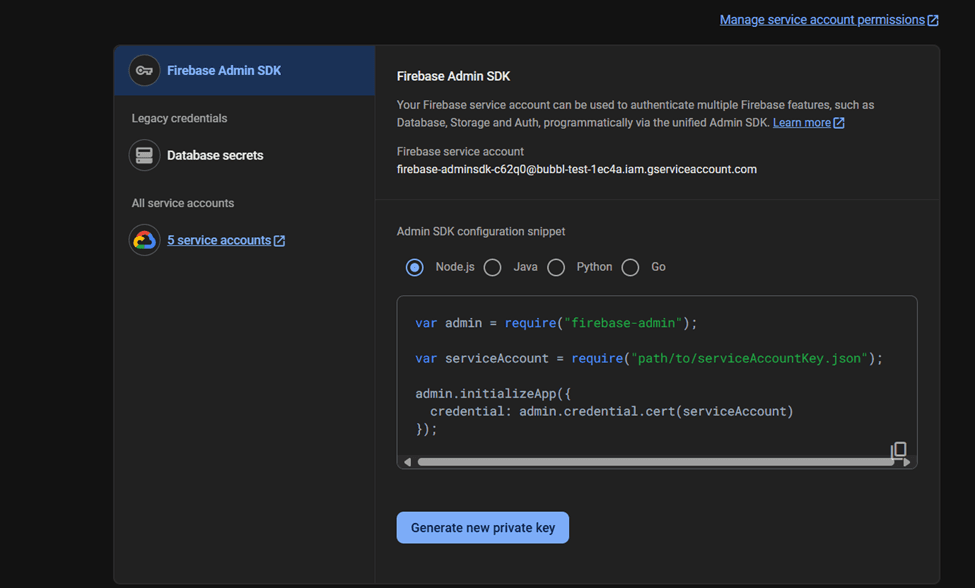
- Click Generate new private key.
- Confirm by clicking Generate key.
- A JSON file will download—this is your service account. Keep it secret!
Step 4: Upload Service Account Credentials

- In your Bubbl Platform UI → Plugins > Firebase Configuration.
- Upload the downloaded JSON under “Upload Firebase Credentials.”
- Your backend is now authorized to send push notifications.
Step 5: Enable Cloud Messaging
To deliver pushes you must turn on Firebase Cloud Messaging.
Enable Cloud Messaging API
1. In the Firebase console, go to APIs & Services > Dashboard in the linked GCP project.
2. Click Enable APIs and Services, search for “Firebase Cloud Messaging API” and enable it.
1. In the Firebase console, go to APIs & Services > Dashboard in the linked GCP project.
2. Click Enable APIs and Services, search for “Firebase Cloud Messaging API” and enable it.
Once these are set, Firebase can route notifications to both Android and iOS (FCM) endpoints.
Global Permissions & Capabilities
🔒 Android Manifest
Ensure the following are in
Ensure the following are in
app/src/main/AndroidManifest.xml<uses-permission android:name="android.permission.INTERNET"/>
<uses-permission android:name="android.permission.ACCESS_FINE_LOCATION"/>
<uses-permission android:name="android.permission.ACCESS_BACKGROUND_LOCATION"/>
<application>
<service
android:name=".MyFirebaseMessagingService"
android:exported="false">
<intent-filter>
<action android:name="com.google.firebase.MESSAGING_EVENT"/>
</intent-filter>
</service>
</application>Mobile App Setup
Register your Android & iOS apps so they can receive notifications & analytics.
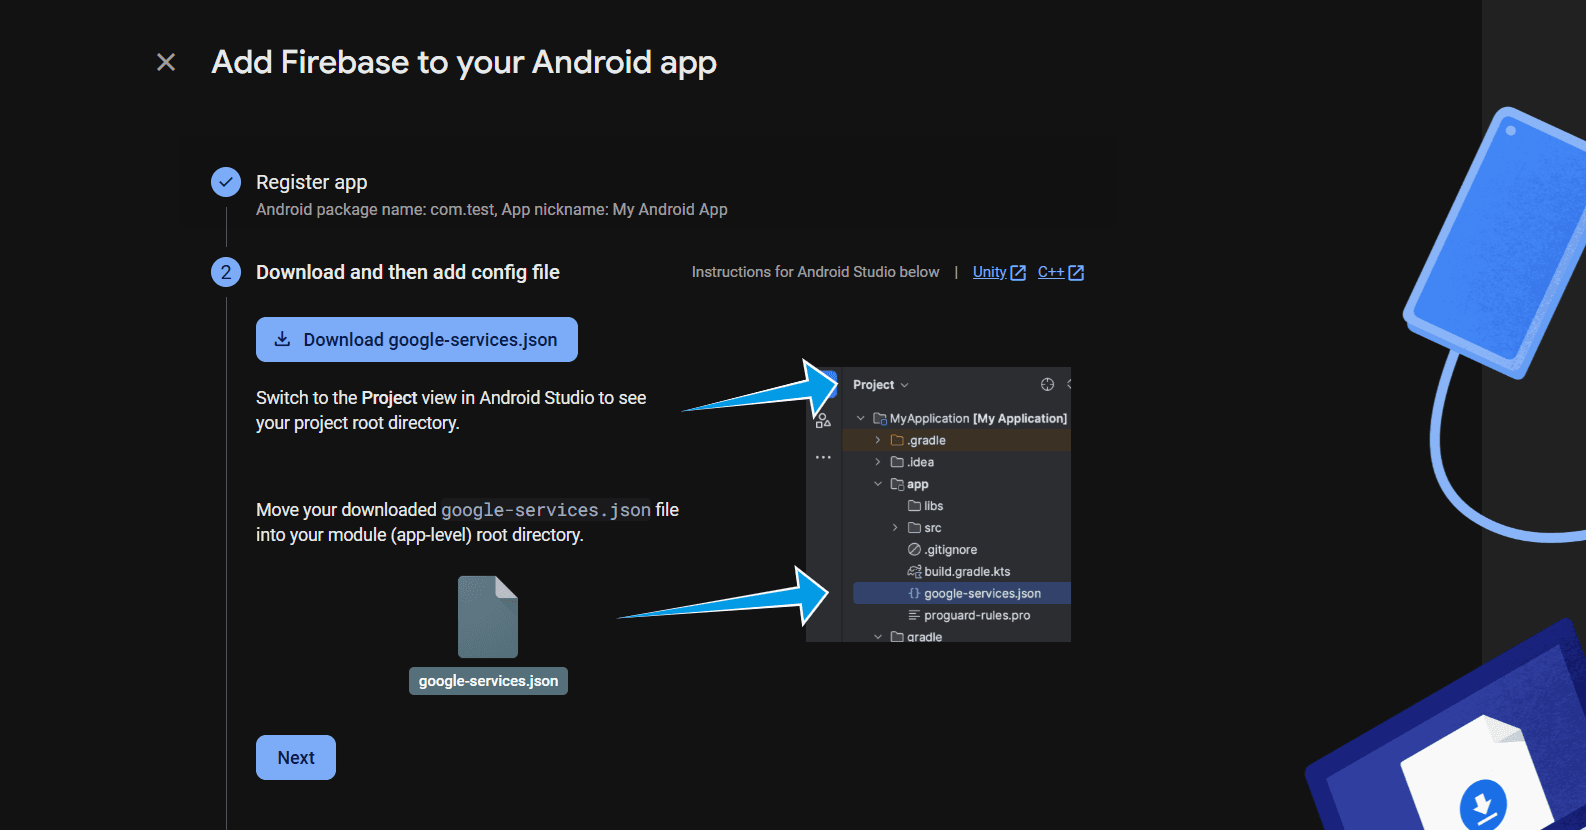
1. Android

- Package name (applicationId), e.g.
.com.example.myapp - App nickname (optional).
- Click Register app.
Download google-services.json
google-services.json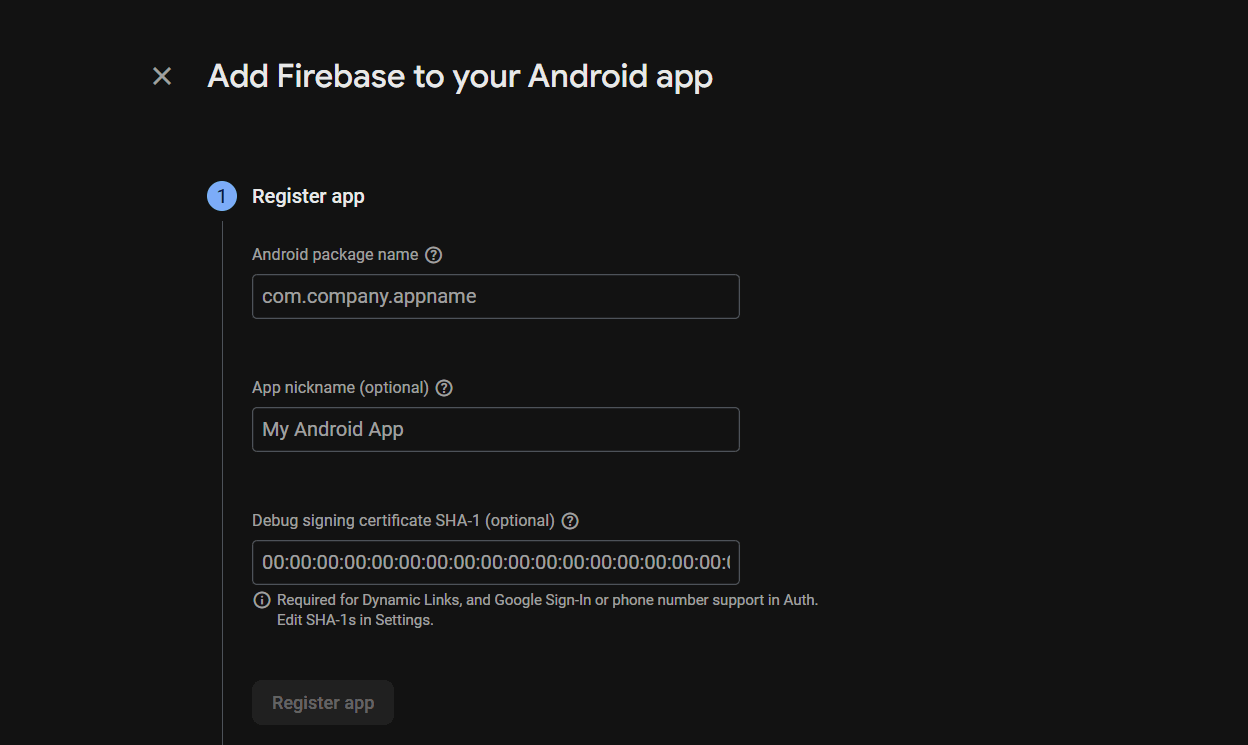
- Download and place it in
.app/
Add Firebase SDK
// project-level build.gradle
buildscript {
repositories { google(); mavenCentral() }
dependencies {
classpath 'com.google.gms:google-services:4.4.2'
}
}
allprojects {
repositories { google(); mavenCentral() }
}
// app-level build.gradle
plugins {
id 'com.android.application'
id 'com.google.gms.google-services'
}
dependencies {
// FIREBASE DEPENDENCIES
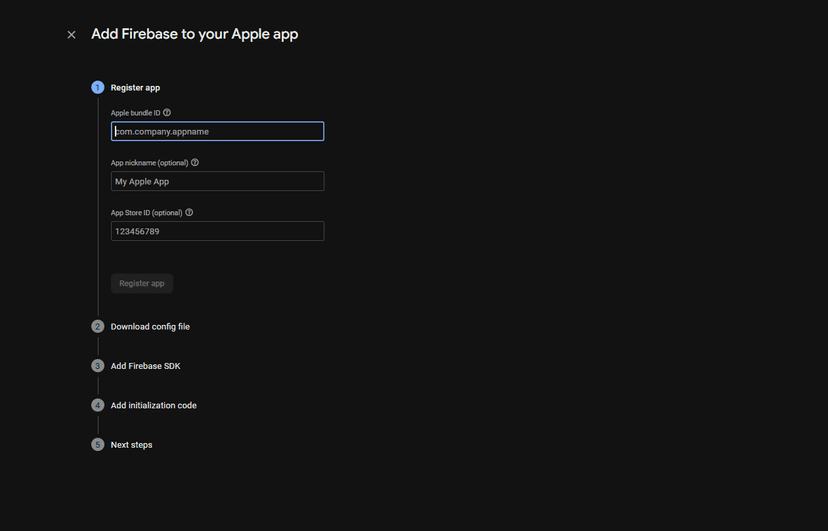
}2. iOS
- Bundle ID (e.g.
).com.example.myapp - Nickname (optional).
- App Store ID (optional).
- Click Register app.
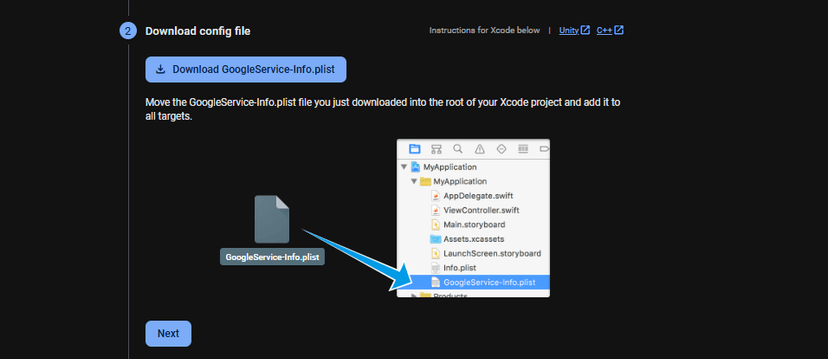
Download GoogleService-Info.plist
GoogleService-Info.plist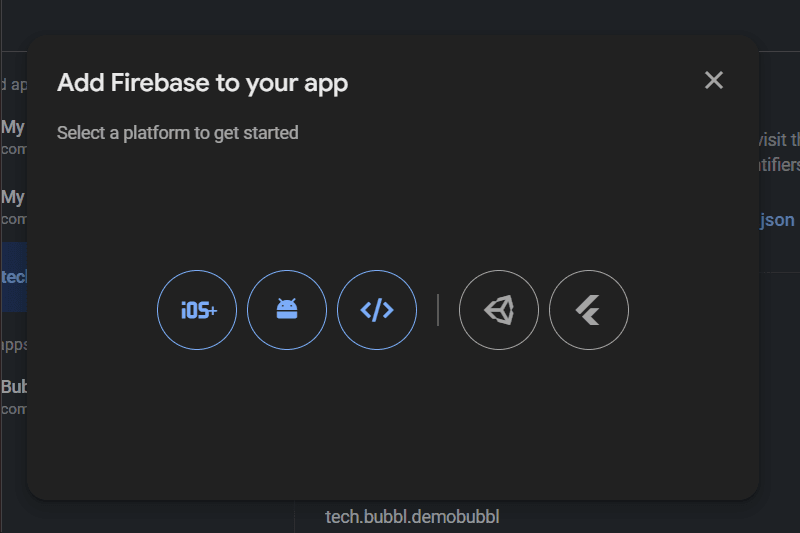
- Drag it into your Xcode project (copy items if needed).
Upload APN Certificate for iOS Push Notifications
🍎 APN Certificate Required: For iOS push notifications to work via Firebase Cloud Messaging, you must upload your Apple Push Notification certificate to Firebase.
Step 1: Generate APN Certificate
- Go to Apple Developer Portal → Certificates
- Click the "+" button to create a new certificate
- Select "Apple Push Notification service SSL (Sandbox & Production)"
- Choose your App ID and follow the CSR upload process
- Download the generated certificate (.cer file)
Step 2: Convert Certificate to .p12 Format
- Double-click the .cer file to add it to your Keychain
- Open Keychain Access → My Certificates
- Find your certificate, expand it to see the private key
- Select both the certificate and private key (Cmd+Click)
- Right-click → Export 2 items → Save as .p12 file
- Set a password (you'll need this for Firebase)
Step 3: Upload to Firebase
- In Firebase Console → Project Settings → Cloud Messaging tab
- Scroll to "Apple app configuration"
- Click "Upload" next to APNs Certificates
- Upload your .p12 file and enter the password
- Save the configuration
💡 Alternative: APNs Auth Key
Instead of certificates, you can use APNs Authentication Keys (recommended for multiple apps):
Instead of certificates, you can use APNs Authentication Keys (recommended for multiple apps):
- Apple Developer → Keys → Create new APNs Auth Key
- Download the .p8 file
- In Firebase → Upload APNs Auth Key with Team ID and Key ID
Enable iOS Capabilities in Xcode
In your iOS app target → Signing & Capabilities, add:
- Push Notifications - Required for receiving notifications
- Background Modes → Location updates - Required for geofencing
Configuration Summary
✅ Checklist - What You've Configured:
- Firebase Service Account: Backend can send notifications
- Cloud Messaging API: Enabled for push delivery
- Android App: Registered with google-services.json
- iOS App: Registered with GoogleService-Info.plist
- APN Certificate/Auth Key: iOS push notifications enabled
- App Capabilities: Push notifications and location updates enabled
Next Steps
Your Firebase configuration is complete! Your mobile apps can now:
- Receive push notifications via Firebase Cloud Messaging
- Generate FCM tokens for the Bubbl SDK to use
- Support geofencing with proper location capabilities
You can now integrate the Bubbl SDK into your apps using the CocoaPods or Manual integration guides.